Create an Action Item
Action Items are excellent reminders of what you need to work on. They can act as steps to help break up larger projects or objectives as well!
Now, with the new Bulk Assign option, multiple employees can be assigned a single action item in one step. It’s a simple, yet effective way to start working towards what matters most.
Action Items Throughout Leadr
Independent Action Items
- Click the "Action Items" tab on the left panel of the Leadr screen.

- To create a new Independent action, separate from any meeting or objective, select "+ New Action Item" in the top right corner of the screen

- Here, you can add a Title and Description of your Action Item
- Note: The Title is mandatory, description is optional
- Then add a "Due By" date (optional)

- If you would like this Action Item to recur, click on the arrows to the right of the Due By date
- Choose which days you'd like your Action Item to recur on and the timing
- Example: you can have your Action Item to recur every 2 weeks on Thursday
- Choose which days you'd like your Action Item to recur on and the timing

- Select "Assignees" to assign an owner (does not have to be yourself). This is where you will be able to add multiple people.
- Note: If no owner is selected, it will default to the creator.
- Select the user(s) from the drop-down list to the left
- Click "Save"

Action Items in Meetings
- When selecting a Meeting, any Action Items associated with that meeting will display at the very bottom of the Meeting.

- From within the Meeting, you will be able to create an action item by clicking "+ Add Item" to the left of the action item section at the bottom of the screen/

- Then add in the Description, Due Date, and Assignee the same way you would for an Independent Action Item. The only limitation here is that you will not be able to add multiple assignees within a meeting, only through an independent action item.
- Once you are satisfied with your action item, click "Save"

- Your Action Item now displays within your Meeting.
Action Items created in a Meeting series will display in future occurrences until completed.

- View your created Action Item from within the meeting under "Open" Action Items

Action Items in Objectives
- Select the Objectives tab on the left side of Leadr

- Either select an existing objective or use "+ New Objective" to create a new Objective

- Create your Objective and save it
- Navigate back to your created Objective, and click on "+ Action Item"

- From here, fill in your Action Item as the Independent Action Item directions
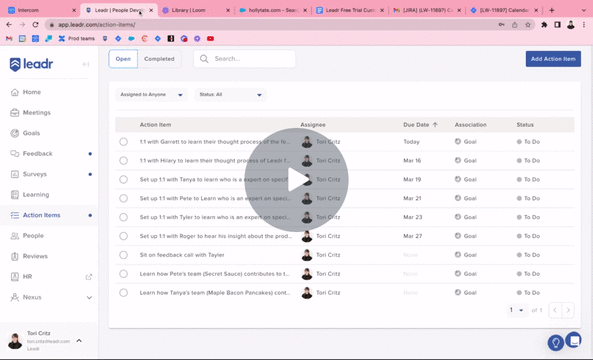
View All Action Items
- Navigate to your Action Item tab on the left side of your Leadr screen.
- Next, with "Open" selected, locate the action item from within the list that you would like to edit/modify
- From here, you can edit, update, mark complete, comment, or delete your Action Item

Reoccurring Action Items
Creating a Recurring Action Item
When creating an action item, the user must specify a due date for the new action item at which time the recurrence icon will become active allowing the user to specify the recurrence settings. The user can select multiple options:
Recurrence Icon
- The number of units to be repeated in this value determines how often the unit specified in option 2 below is repeated. Examples are “1” week or “2” months.
- The unit to be repeated this value determines the interval in which the action is repeated in weeks or months
- The days of the week to repeat the item on. When choosing weekly, the user can select which days of the week the action should repeat on.
- The day of the month to repeat the item when choosing monthly, the user can select which day of the month the action should repeat. For values over 28, the option includes “Last Day” which means the action will repeat on the last day of the month if the month doesn’t have a day number that high.

Using a Recurring Action Item
Users can see an action item is recurring in the listing of action items by the inclusion of the recurrence icon.
The next action item in the pattern is created and made visible when the current one is completed. All instances in the pattern must be completed - ie if today is Friday and the user has an action that repeats daily and they haven’t completed it since Monday, they will have to complete the Monday instance, then complete the Tuesday instance, the Wednesday instance, and so on to get the instance current.
Editing a Recurring Action Item
To edit a recurring action item, edit the action and change the recurrence pattern as needed. Recurrence can be added to existing action items as long as an initial due date is specified.
Ending a Recurring Action Item
To end the recurrence, the user can delete the currently visible instance which will remove it and end the recurrence so no future instances are created.
Comments within Action Items
Meetings
- Click three vertical dots on the Action
- Select Edit Action Item
- Scroll Down to Comments
- After typing in comments select Add Comment

Objectives
- Click on the objective
- Then select Actions
- Click on the Action
If you are a collaborator you will only have the ability to comment on Actions you are assigned. Update the overall objective status through the Objective->Updates
- Follow steps 3 and 4 above
Independent
- Within the Action Item Tab
- Locate Action Item
- Click into Action
To ensure you do not accidentally complete the action, click away from the completion icon

- Follow the steps from above
The ability to add and edit comments on action items will have certain permissions
|
Task/Action |
Admin |
Creator |
Assignee |
|---|---|---|---|
| Add Comment | Yes | Yes | Yes |
| Edit/Delete Their Own Comments | Yes | Yes | Yes |
| Edit/Delete Others Comments | Yes | No | No |
Video Walk-Thru
If you have any additional questions feel free to reach out through the chat icon below or email us at support@leadr.com